VMware vCenter Multi-Hypervisor Manager インストール
vCenter から、Hyper-V を管理可能な"VMware vCenter Multi-Hypervisor Manager 1.0"がリリースされました。
現時点では、Microsoft 社のHyper-V2.0 のみが管理対象となります。
vCenter Multi-Hypervisor Manager は、vCenter Server5.1 以上で利用可能で、vSphere Client5.1 の拡張機能となります。詳細については、Release Note をご参照ください。
Multi-Hypervisor Manager for Windows のダウンロードはこちら
以下、インストール例になります。
インストーラを起動しデフォルト設定で[Next]をクリックします。

Certificate Source は、"Automatically generate a certicate"を選択します。

vCenter の情報を入力し[Next]をクリックします。

"I accept this SSL certificate"をチェックし[Next]をクリックします。

Multi-Hypervisor Manager Service 用のアカウントを指定します。

なお、このユーザーは"サービスとしてログオン"ポリシーを適用されている必要があります。
適用されていない場合、下記エラーが出力されます。
"The provided credential are of a user that does not have sufficient rights to run a service."
ローカルポリシー > ユーザー権利の割り当てから、"サービスとしてログオン"を実行します。
"ユーザーまたはグループの追加"をクリックします。

ユーザー(例:Administrator)を登録し[OK]をクリックします。

デフォルトの設定で[Next]をクリックします。

[Install]をクリックします。

[Finish]をクリックします。

vSphere Client で vCenter へ接続し、プラグインマネージャを起動します。

VMware vCenter Multi-Hypervisor Manager の[ダウンロードとインストール]を実行します。

VMware vCenter Multi-Hypervisor Manager client がインストールされます。

インベントリに"VMware vCenter Multi-Hypervisor Manager"が追加されます。

"Add a Third-Party Host"を実行し、Hyper-V を追加します。

Hostname/IP address 及びアカウント情報を入力し[次へ]をクリックします。

"Unable to connect to host"エラーとなる場合は、Hyper-V 側で下記を実行してみてください。
C:\Windows\system32>winrm qc
WinRM サービスは、既にこのコンピューターで実行されています。
WinRM は、管理用にこのコンピューターへのリモート アクセスを許可するように設定されていません。
次の変更を行う必要があります:

ローカル ユーザーにリモートで管理権限を付与するよう LocalAccountTokenFilterPolicy を構成してください。

変更しますか [y/n]? y

WinRM はリモート管理用に更新されました。

ローカル ユーザーにリモートで管理権限を付与するよう LocalAccountTokenFilterPolicy を構成しました。
C:\Windows\system32>winrm set winrm/config/client @{TrustedHosts="*"}
Client
    NetworkDelayms = 5000
    URLPrefix = wsman
    AllowUnencrypted = false
    Auth
        Basic = true
        Digest = true
        Kerberos = true
        Negotiate = true
        Certificate = true
        CredSSP = false
    DefaultPorts
        HTTP = 5985
        HTTPS = 5986
    TrustedHosts = *
[OK]をクリックします。

[次へ]をクリックします。

[終了]をクリックします。

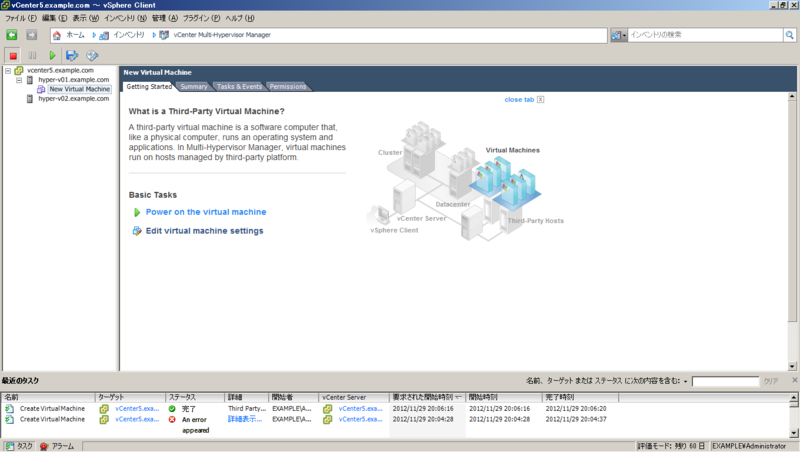
Hyper-V が追加され、仮想マシンが作成可能になります。"New Virtual Machine"をクリックします。

とりあえず、デフォルトの設定で作成します。内容を確認し[終了]をクリックします。

インベントリに仮想マシンが追加されます。"Power on the virtual machine"をクリックします。
Hyper-V マネージャーを確認すると、対象の仮想マシンが作成され起動している事が確認できました。
