Firebase web codelab について
はじめに
Firebase でチャットアプリを作成するチュートリアル(Firebase web codelab)を試してみました。
チュートリアルでは、以下のことが学べます。
- Cloud Firestore と Cloud Storage のデータ同期
- Firebase Authentication のユーザー認証
- Web アプリケーションのデプロイ
- Firebase Cloud Messaging の通知送信
- Web アプリケーションのパフォーマンスデータ収集
環境
・Firebase 8.2.1
・openSUSE Tumbleweed 20201229
・Virtual Machine:2vCPU, 4GB Memory, 40GB Disk
・VMware(R) Workstation 15 Pro
事前準備
root ユーザー移行
sudo su -
git インストール
zypper install git
npm インストール
zypper install npm
サンプルコードの入手
codelab のリポジトリを複製
git clone https://github.com/firebase/codelab-friendlychat-web
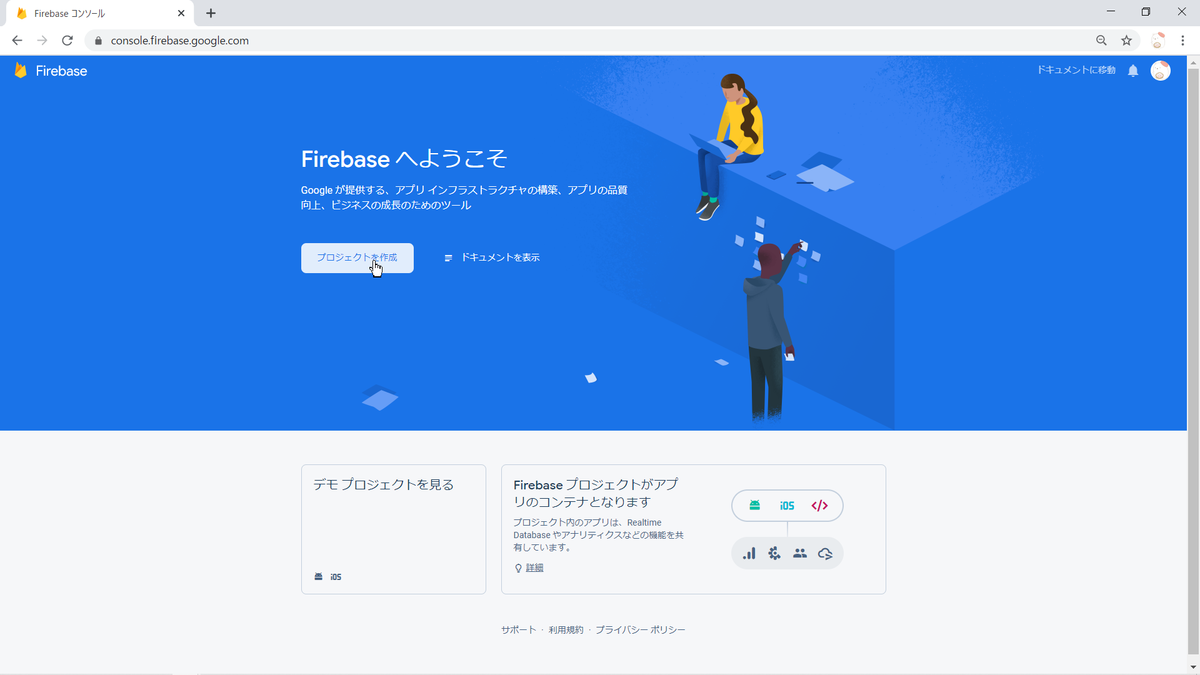
Firebase プロジェクト作成
Firebase にログインして、プロジェクトを作成します。
Firebase Authentication の設定
ウェブアイコン をクリックして、Firebase Web アプリを作成します。

左ペインの「Authentication」➡「Sign-in method」で「Google」をクリックして、有効化します。

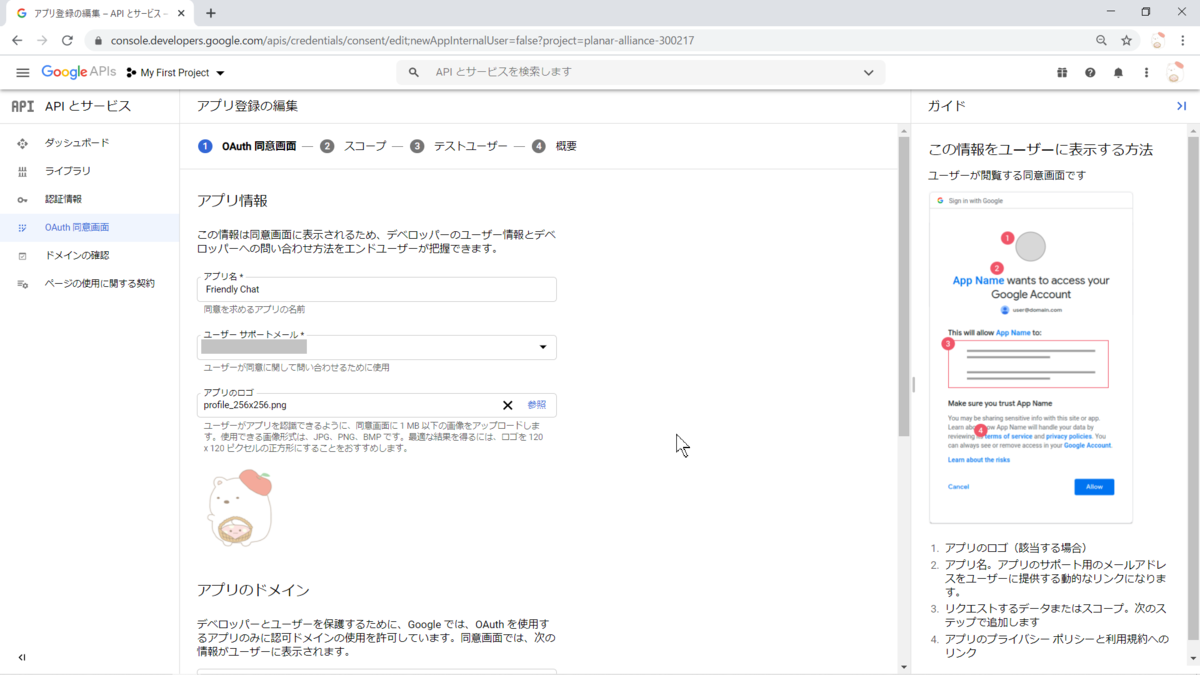
Google Cloud Console で OAuth 同意画面を設定します。*1
Cloud Firestore の設定
左ペインの「Cloud FIrestore」から「データベース作成」をクリックして「テストモード」を有効化します。

Firebase CLI インストール
CLI インストール
sudo su -
npm -g install firebase-tools
インストール確認
cd /home/hatkobelab/codelab-friendlychat-web/web-start/
firebase --version
Firebase CLI 承認
firebase login
※CLI をインストールした OS 上で実行する必要があります。それ以外の場合は、localhost に接続できずエラーとなります。本例では、以下のように openSUSE で実行しました。

アプリと Firebase プロジェクトを紐づけ
firebase use --add
? Which project do you want to add? friendlychat-46e4f
? What alias do you want to use for this project? (e.g. staging) default
アプリをローカルで実行
アプリを実行
firebase serve --only hosting
※上述と同様に OS 上で実行します。
ブラウザから http://localhost:5000 に接続
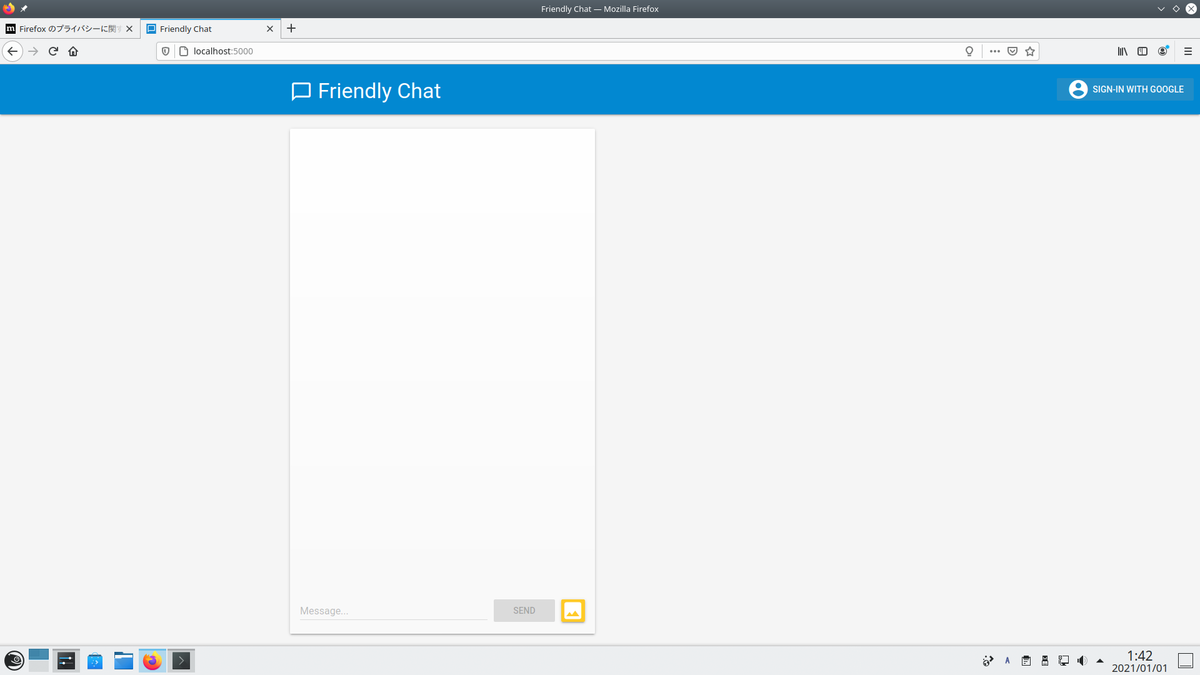
アプリの UI が接続されますが、認証がとおっていないため、まだ機能しません。
ユーザーサインイン設定
チュートリアルでは、Google サインインでユーザー認証するためのコードが用意されているので、対象の関数を置き換えます。ファイルは web-start/public/scripts/main.js です。
関数:signIn
// Signs-in Friendly Chat.
function signIn() {
  // Sign into Firebase using popup auth & Google as the identity provider.
  var provider = new firebase.auth.GoogleAuthProvider();
  firebase.auth().signInWithPopup(provider);
}
関数:signOut
// Signs-out of Friendly Chat.
function signOut() {
  // Sign out of Firebase.
  firebase.auth().signOut();
}
関数:initFirebaseAuth
// Initiate Firebase Auth.
function initFirebaseAuth() {
  // Listen to auth state changes.
  firebase.auth().onAuthStateChanged(authStateObserver);
}
関数:getProfilePicUrl
// Returns the signed-in user's profile pic URL.
function getProfilePicUrl() {
  return firebase.auth().currentUser.photoURL || '/images/profile_placeholder.png';
}
関数:getUserName
// Returns the signed-in user's display name.
function getUserName() {
  return firebase.auth().currentUser.displayName;
}
関数:isUserSignedIn
// Returns true if a user is signed-in.
function isUserSignedIn() {
  return !!firebase.auth().currentUser;
}
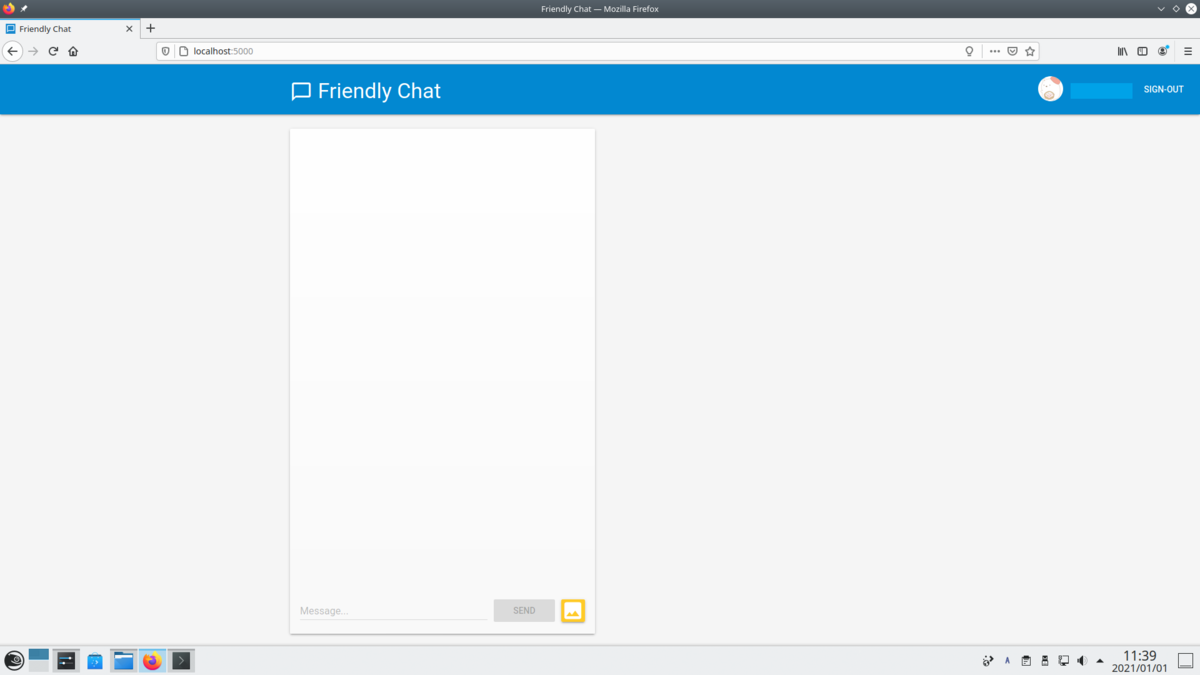
サインインのテストは、上述と同様に OS 上で実行します。
firebase serve --only hosting
以下のように Google でサインインができるようになります。
メッセージの書き込み設定
アプリケーションの UI にデータ入力ができるように Cloud Firestore にデータを書き込みます。ユーザーが作成したメッセージは、Cloud Firestore に保存されます。
チュートリアルでは、ユーザーが「Send」ボタンをクリックすると、データベースに保存するコードが用意されているので、対象の関数を置き換えます。ファイルは web-start/public/scripts/main.js です。
関数:saveMessage
// Saves a new message to your Cloud Firestore database.
function saveMessage(messageText) {
  // Add a new message entry to the database.
  return firebase.firestore().collection('messages').add({
    name: getUserName(),
    text: messageText,
    profilePicUrl: getProfilePicUrl(),
    timestamp: firebase.firestore.FieldValue.serverTimestamp()
  }).catch(function(error) {
    console.error('Error writing new message to database', error);
  });
}
ブラウザから http://localhost:5000 に接続し「hello」などのメッセージを入力して「Send」ボタンをクリックすると、Firebase コンソールでメッセージを確認できます。

メッセージの読み取り設定
アプリケーションでメッセージを読み取り、表示させます。
データベース内のメッセージが更新された際に、新しいメッセージをアプリケーションに表示させるように対象の関数を置き換えます。ファイルは web-start/public/scripts/main.js です。
関数:loadMessages
// Loads chat messages history and listens for upcoming ones.
function loadMessages() {
  // Create the query to load the last 12 messages and listen for new ones.
  var query = firebase.firestore()
                  .collection('messages')
                  .orderBy('timestamp', 'desc')
                  .limit(12);

  // Start listening to the query.
  query.onSnapshot(function(snapshot) {
    snapshot.docChanges().forEach(function(change) {
      if (change.type === 'removed') {
        deleteMessage(change.doc.id);
      } else {
        var message = change.doc.data();
        displayMessage(change.doc.id, message.timestamp, message.name,
                       message.text, message.profilePicUrl, message.imageUrl);
      }
    });
  });
}
画像送信設定
画像を共有する機能を追加します。
Cloud Firestore は、構造化データの保存に適していますが、Cloud Storage はファイルの保存に適しています。
ユーザーがアプリケーションを使用して共有する画像を Cloud Storage に保存するように対象の関数を置き換えます。ファイルは web-start/public/scripts/main.js です。
関数:saveImageMessage
// Saves a new message containing an image in Firebase.
// This first saves the image in Firebase storage.
function saveImageMessage(file) {
  // 1 - We add a message with a loading icon that will get updated with the shared image.
  firebase.firestore().collection('messages').add({
    name: getUserName(),
    imageUrl: LOADING_IMAGE_URL,
    profilePicUrl: getProfilePicUrl(),
    timestamp: firebase.firestore.FieldValue.serverTimestamp()
  }).then(function(messageRef) {
    // 2 - Upload the image to Cloud Storage.
    var filePath = firebase.auth().currentUser.uid + '/' + messageRef.id + '/' + file.name;
    return firebase.storage().ref(filePath).put(file).then(function(fileSnapshot) {
      // 3 - Generate a public URL for the file.
      return fileSnapshot.ref.getDownloadURL().then((url) => {
        // 4 - Update the chat message placeholder with the image's URL.
        return messageRef.update({
          imageUrl: url,
          storageUri: fileSnapshot.metadata.fullPath
        });
      });
    });
  }).catch(function(error) {
    console.error('There was an error uploading a file to Cloud Storage:', error);
  });
}
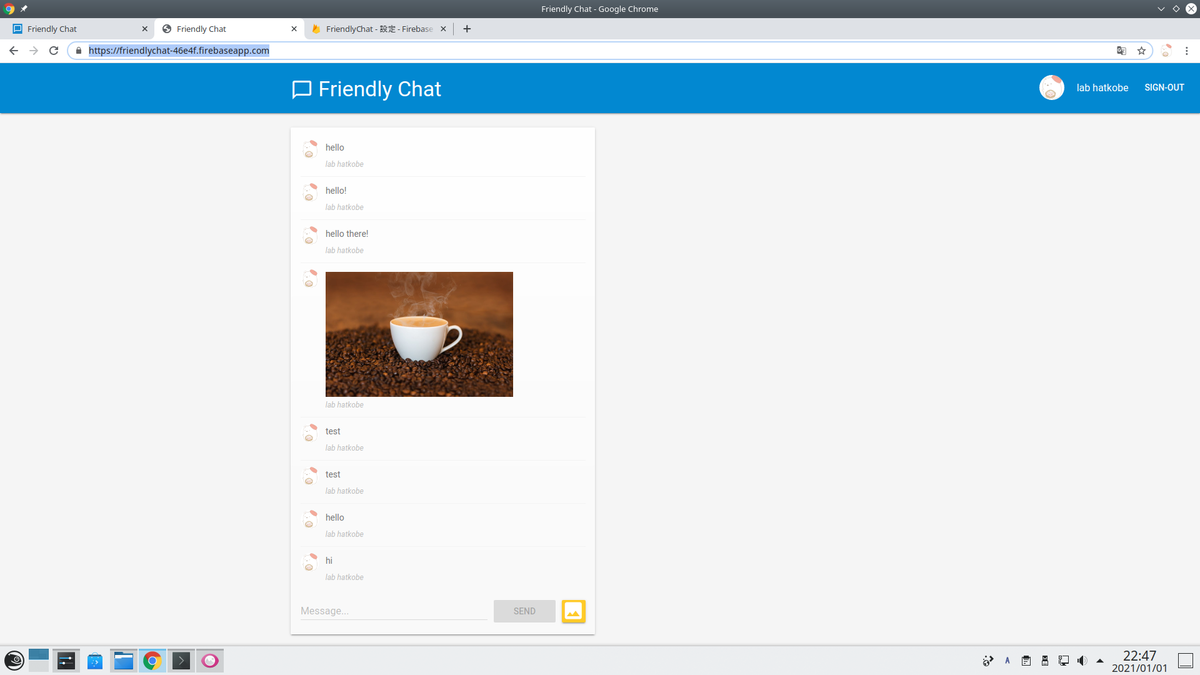
ブラウザから http://localhost:5000 に接続し「hello」などのメッセージを入力して「Send」ボタンをクリックすると、アプリケーションに表示されます。また、画像をアプリケーションにアップロードすることもできます。

パフォーマンスデータ収集
Performance Monitoring SDK を使用して、アプリケーションからパフォーマンスデータを収集し、Firebase コンソールでデータの確認および分析ができます。
自動トレースの設定
アプリケーション利用時に自動的にパフォーマンスデータ監視を行うためには、main.js に以下を追加します。
// TODO: Initialize Firebase Performance Monitoring.
firebase.performance();
パフォーマンスデータの表示
Firebase コンソールからパフォーマンスデータを確認できます。通常は、この後の手順で実施するデプロイ後、12時間以内に表示されます。

アプリケーションのデプロイ
Firebase Hosting を使用してアプリケーションを Firebase プロジェクトにデプロイします。
コマンドは以下を使用します。
> cd /home/hatkobelab/codelab-friendlychat-web/web-start/
> firebase deploy --except functions
デプロイ後、Firebase Hosting の URL(以下の2つの Firebase 独自サブドメイン)から、ウェブアプリケーションにアクセスできるようになります。
https://<firebase-projectId>.firebaseapp.com
https://<firebase-projectId>.web.app
通知設定
Firebase Cloud Messaging を使用して、ウェブアプリに通知を配信することができます。
送信者 ID 許可
アプリケーション側で、通知を許可する送信 ID を設定する必要があります。 web-start/public/manifest.json の gcm_sender_id で設定します。※固定値で変更できません。
{
  "name": "Friendly Chat",
  "short_name": "Friendly Chat",
  "start_url": "/index.html",
  "display": "standalone",
  "orientation": "portrait",
  "gcm_sender_id": "103953800507"
}
Service Worker の追加
通知をアプリケーションに表示させるために必要な Service Worker を追加します。 web-start/public ディレクトリに irebase-messaging-sw.js という名前のファイルを作成して、以下のコンテンツを追加します。*2
// Import and configure the Firebase SDK
// These scripts are made available when the app is served or deployed on Firebase Hosting
// If you do not want to serve/host your project using Firebase Hosting see https://firebase.google.com/docs/web/setup
importScripts('/__/firebase/8.2.1/firebase-app.js');
importScripts('/__/firebase/8.2.1/firebase-messaging.js');
importScripts('/__/firebase/init.js');

firebase.messaging();
デバイストークンの取得
デバイスまたはブラウザで通知が有効になると、デバイストークンが提供されます。
ユーザーがサインインすると、ブラウザからデバイストークンを取得し、Cloud Firestore に保存するように設定します。ファイルは web-start/public/scripts/main.js です。
// Saves the messaging device token to the datastore.
function saveMessagingDeviceToken() {
  firebase.messaging().getToken().then(function(currentToken) {
    if (currentToken) {
      console.log('Got FCM device token:', currentToken);
      // Saving the Device Token to the datastore.
      firebase.firestore().collection('fcmTokens').doc(currentToken)
          .set({uid: firebase.auth().currentUser.uid});
    } else {
      // Need to request permissions to show notifications.
      requestNotificationsPermissions();
    }
  }).catch(function(error){
    console.error('Unable to get messaging token.', error);
  });
}
通知権限のリクエスト
ユーザーに通知許可を求めるダイアログをブラウザに表示させます。ユーザーで許可していない場合、デバイストークンは提供されません。
// Requests permission to show notifications.
function requestNotificationsPermissions() {
  console.log('Requesting notifications permission...');
  firebase.messaging().requestPermission().then(function() {
    // Notification permission granted.
    saveMessagingDeviceToken();
  }).catch(function(error) {
    console.error('Unable to get permission to notify.', error);
  });
}
サインイン後、通知許可ダイアログが表示されます。

「許可」をクリックすると、ブラウザの JavaScript コンソールに次のメッセージが表示されます。
Got FCM device token: cWL6w:APA91bHP...4jDPL_A-wPP06GJp1OuekTaTZI5K2Tu
ブラウザに通知を送信
デバイストークンと、サーバーキーを設定し、次の cURL コマンドを実行します。
サーバーキーは、Firebase コンソール から「プロジェクトの概要」➡「プロジェクトを設定」➡「Cloud Messaging」 で確認できます。
curl -H "Content-Type: application/json" \
     -H "Authorization: key=YOUR_SERVER_KEY" \
     -d '{
           "notification": {
             "title": "New chat message!",
             "body": "There is a new message in FriendlyChat",
             "icon": "/images/profile_placeholder.png",
             "click_action": "http://localhost:5000"
           },
           "to": "YOUR_DEVICE_TOKEN"
         }' \
     https://fcm.googleapis.com/fcm/send
アプリケーションがバックグラウンドにある場合、次のようにブラウザに通知が表示されます。

以上
Firebase について
Firebase とは
Google が提供しているモバイルおよび Web アプリケーションの BaaS(バックエンドサービス)
Firebase を使うことで、開発者はアプリケーションの開発に専念でき、バックエンドで動くサービスを作成・管理する必要がありません。
Firebase の機能
Firebase では主に以下の機能が提供されています。(2020年12月31日時点)
参考:株式会社トップゲート

Cloud Firestore
Realtime Database の性能をさらに向上させたデータベース。 Realtime Database より高速でスケールアウトにも対応しています。Google は Realtime Database より Cloud Firestore を推奨していて、今後の主力となるデータベースのようです。
Cloud Storage for Firebase
写真や動画などバイナリーデータを保存します。保存先は Cloud Storage となっており、 Firebase と Google Cloud の両方からアクセスできます。

Firebase Authentication
Google のフェデレーション認証で、 Google, Facebook, Twitter などの認証情報を使用してクライアントアプリケーションにログインすることができます。
また、パスワード認証や電話番号認証にも対応しています。

Firebase Cloud Messaging(FCM)
様々なプラットホームで動いているアプリケーションに対してメッセージを送ることができます。
Google Cloud Functions for Firebase
イベントドリブンなアプリケーションを作成し SMS メッセージの送信処理のような外部サービス連携が可能となります。

Firebase SDK
Firebase の主な機能(Realtime Database, Cloud Firestore, Firebase Hosting など)を使用できる SDK が提供されています。サポートされているプラットフォームには、 Android, iOS, Web, Unity, C++ などがあります。
以上
Google Cloud Shell のリセット手順
Cloud Shell とは
Google Cloud Shell は、debian ベースのオンライン bash シェルで、Web ブラウザ経由でアクセスできます。
無料利用枠で、$HOME ディレクトリに 5 GB の永続ディスク ストレージが提供されています。
インターネットと Web ブラウザがあれば、いつでもどこでも利用できるため、最近重宝しています。
リセット手順
Cloud Shell のホーム ディレクトリを空の状態に戻すには:
1. ホーム ディレクトリの個人ファイルを確認します。
ls -a $HOME
2. ホーム ディレクトリからすべてのファイルを削除します。
sudo rm -rf $HOME
3. Cloud Shell メニューで、その他メニュー アイコン、「Cloud Shell を再起動」の順にクリックします。
以上
openSUSE Tumbleweed で Cron 実行
openSUSE ソフトウェアで「cronie」を検索し、openSUSE Tumbleweed の「1クリックインストール」をクリックしてインストールします。

crontab 設定
hostname:~# crontab -e
# 30分毎に起動する
*/30 * * * * urlwatch
crontab 設定確認
hostname:~# crontab -l
crontab ステータス確認
hostname:~# systemctl status cron.service
crontab 実行確認
hostname:~# tail -f /var/spool/mail/[user_name]
参考書籍
リンク
以上
openSUSE Tumbleweed インストール手順
openSUSE Tumbleweed 20201229 のざっくりしたインストール手順例です。
公式サイトから、DVD イメージをダウンロードし、イメージをマウント・実行します。
installation を選択します。

言語/キーボード/ライセンスなど、基本的な設定は「次へ」をクリック
オンラインリポジトリは、必要なものが明確でなければ、デフォルトで OK です。

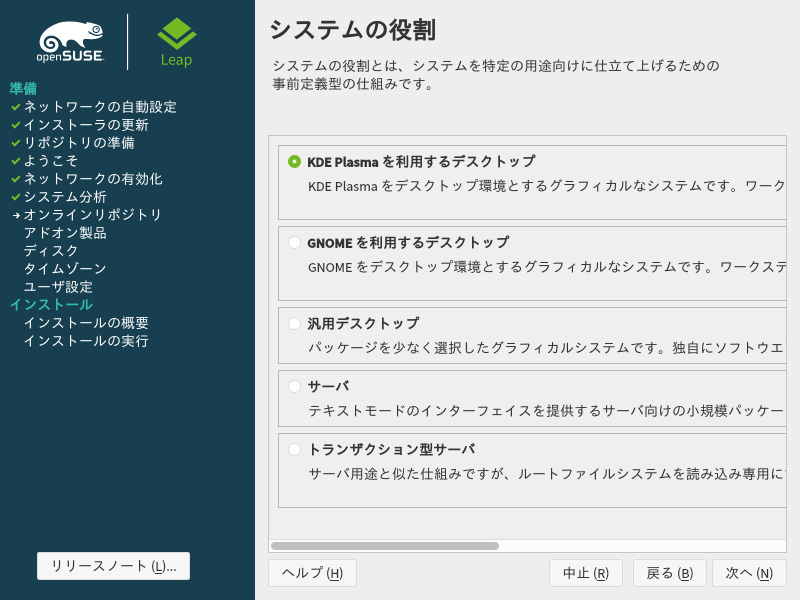
システムの役割も特に指定がなければ、デフォルトで OK です。
パーティションも同様です。

タイムゾーンは「日本」で、「ハードウェアの時刻を UTC に設定する」にチェック

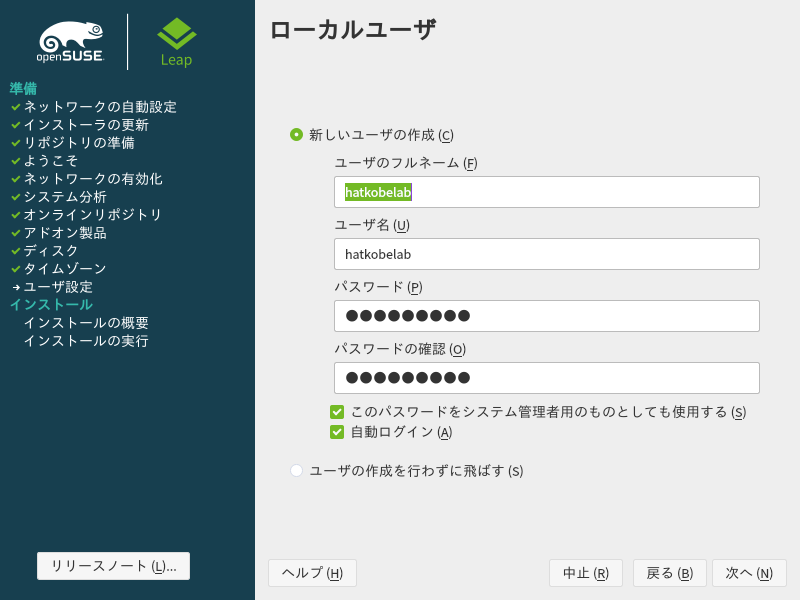
ユーザーを設定します。
設定内容を確認して「インストール」をクリックします。

以上
オープンソースの WAF(ModSecurity)について
WAF とは
WAF は、ウェブアプリケーションの脆弱性を悪用した攻撃などからウェブアプリケーションを保護するソフトウェア、またはハードウェアです。
WAF を使用することで以下の効果を期待できます。
- 脆弱性を悪用した攻撃からウェブアプリケーションを防御する。
- 脆弱性を悪用した攻撃を検出する
- 複数のウェブアプリケーションへの攻撃をまとめて防御する
また WAF は、検出パターンに基づき通信の中身を機械的に検査するため、実際に人の目で見る場合と異なる判定が生じる場合があります。この判定結果により、ウェブアプリケーションの脆弱性を悪用した攻撃などの悪意ある通信を遮断できない場合や、利用者がウェブサイトを閲覧する正常な通信を遮断してしまう場合があるため、導入時に考慮する必要があります。
出典:Web Application Firewall (WAF) 読本 改訂第2
ModSecurity とは
TrustWave 社が GPLv2 ライセンスのもと提供しているオープンソースの WAF です。
IPA で導入・運用を継続している実績があります。
出典: オープンソース WAF「ModSecurity」導入事例 ~ IPA はこう考えた ~
ModSecurity 構築例
本例では、以下の環境でテストします。

また、本環境で対応する脆弱性は以下の 2 つのみとします。
- XSS(クロスサイト・スクリプティング)
- SQL インジェクション
Apache リバースプロキシ設定
以下をコメントアウト
[root@hostname ~]# vi /etc/httpd/conf/httpd.conf
LoadModule proxy_module modules/mod_proxy.so
LoadModule proxy_http_module modules/mod_proxy_http.so
以下を最終行に追加
[root@hostname ~]# vi /etc/httpd/conf/httpd.conf
ProxyRequests Off
ProxyPass /WebGoat http://10.1.23.253/WebGoat
ProxyPassReverse /WebGoat http://10.1.23.253/WebGoat
# 上記のように設定すると、例えば、 10.1.12.252/WebGoat のリクエストを http://10.1.23.253/WebGoat へ転送します。
ModSecurity インストール事前準備
EPEL リポジトリ追加
yum install epel-release
リポジトリ設定
[root@hostname ~]# vi /etc/yum.repos.d/epel.repo

# コメントイン
baseurl=http://download.fedoraproject.org/pub/epel/6/$basearch
# コメントアウト
#mirrorlist=https://mirrors.fedoraproject.org/metalink?repo=epel-6&arch=$basearch

# コメントイン
baseurl=http://download.fedoraproject.org/pub/epel/6/$basearch/debug
# コメントアウト
#mirrorlist=https://mirrors.fedoraproject.org/metalink?repo=epel-debug-6&arch=$basearch

# コメントイン
baseurl=http://download.fedoraproject.org/pub/epel/6/SRPMS
# コメントアウト
#mirrorlist=https://mirrors.fedoraproject.org/metalink?repo=epel-source-6&arch=$basearch
ModSecurity インストール
ModSecurity と CRS をインストール
[root@hostname ~]# yum --enablerepo=epel install -y mod_security mod_security_crs
[root@hostname ~]# service httpd restart
XSS と SQL インジェクションのルールのみ適用
[root@hostname ~]# vi /etc/httpd/conf.d/mod_security.conf

# コメントアウト
# Include modsecurity.d/activated_rules/*.conf
# 10~11 行目追加
Include modsecurity.d/activated_rules/modsecurity_crs_41_xss_attacks.conf
Include modsecurity.d/activated_rules/modsecurity_crs_41_sql_injection_attacks.conf
Apache 再起動
[root@hostname ~]# /etc/rc.d/init.d/httpd restart
WAF のテスト
ModSecurity 無効時
OWASP ZAP の動的スキャンを行うと、SQL インジェクションの脆弱性が見つかります。
※OWSAP ZAP については、こちらをご参照ください。

ModSecurity 有効時
SQL インジェクションの脆弱性が検出されなくなりました。

リアルタイムで診断状況を確認すると、ステータスコードが「Forbidden」となっていることが確認できます。

参考: ModSecurity 無効化
一時的に無効化した場合は、以下の設定をします。
[root@hostname ~]# vi /etc/httpd/conf.d/mod_security.conf

# コメントアウト
#SecRuleEngine On
# 追加
SecRuleEngine Off
Apache 再起動
[root@hostname ~]# /etc/rc.d/init.d/httpd restart
参考書籍
リンク
以上
Internet Explorer 表示した PDF を保存できない
フォルダリダイレクトが有効になっている環境で、Internet Explorer 表示した PDF を保存しようとすると、以下のエラーが発生する場合があります。
保存しようとしたディスクまたは一時ファイルに使用するディスクがいっぱいです。このディスクの容量を空けてもう一度保存しなおすか、別のディスクに保存してください。
こちらによると、ディスク容量は問題なくても、Adobe Reader の保護モードの不具合が原因で発生する可能性があり、以下の手順で保護モードを無効にすると回避できるようです。
- 編集/環境設定を選択します。
- 左側の「分類」から、「セキュリティ(拡張)」を選択します。
- 「サンドボックスによる保護」領域で、「起動時に保護モードを有効にする」をオフにします。
なお、ドメイン管理下の PC は、GPO(レジストリ)を利用して一括で設定することも可能です。
キー:HKEY_CURRENT_USER\SOFTWARE\Adob<200b>e\Acrobat Reader\DC\Privledged
値:bProtectedMode
値のデータ:0

以上
Horizon 7 に物理 PC に登録する方法
通常、Horizon に vCenter Server を登録し、vCenter 管理化の仮想 PC に VMware Horizon View Agent をインストールすることで、Horizon に仮想 PC が(自動で)登録されますが、vCenter の管理化にない仮想 PC や、物理 PC を Horizon に登録することも可能です。
簡易検証環境等、vCenter をたてずに Horizon を検証する際に便利です。
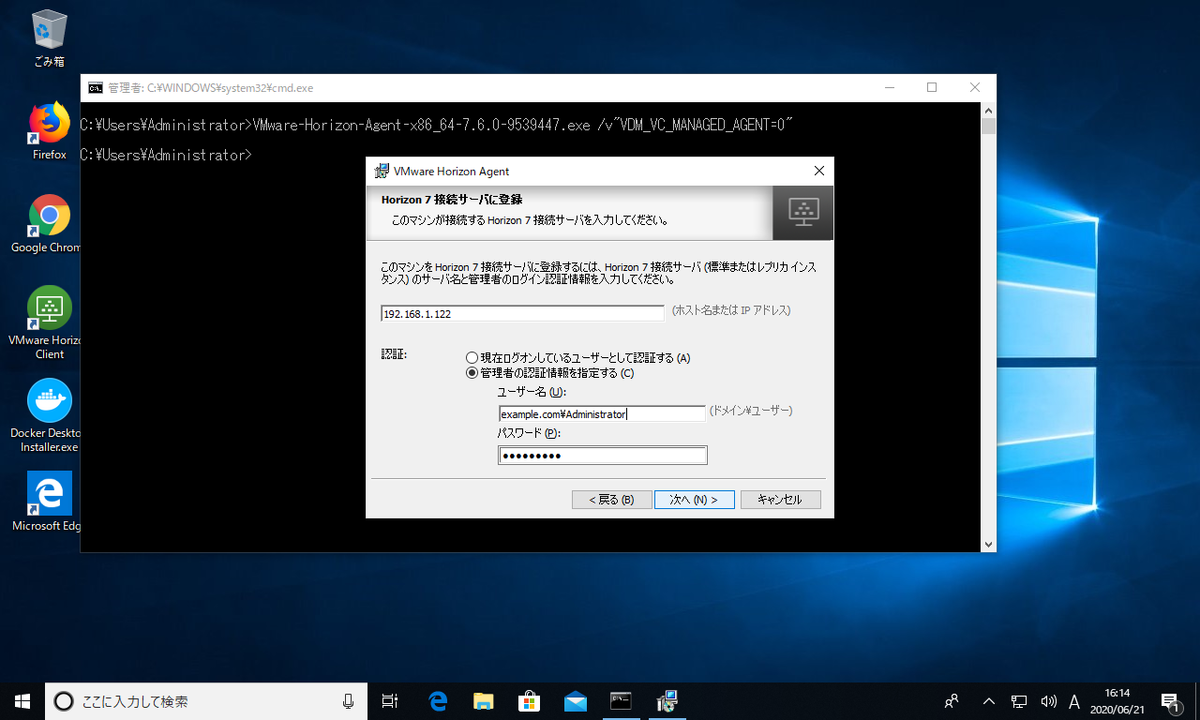
対象の仮想 PC(または物理 PC)に Horizon View Agent をインストールする際、以下のオプションを付与してインストールします。
/v"VDM_VC_MANAGED_AGENT=0"
すると Horizon 接続サーバーを登録するボックスが表示されます。
インストール完了後、View Administrator から仮想 PC を選択できるようになります。
以上
Apache の起動に失敗
Apache 2.2.15 でサービスを再起動した際、起動に失敗する事象に遭遇しました。
[root@hostname ~]# service httpd restart
httpd を停止中:                                            [  OK  ]
httpd を起動中:                                            [失敗]
/var/log/httpd/error_log を確認すると以下のエラーが出力されていました。
 [alert] (EAI 2)Name or service not known: mod_unique_id: unable to find IPv4 address of "lablog01"
Configuration Failed
原因は、hostname と /etc/hosts が一致していないことのようです。
[root@hostname ~]# hostname
lablog01
[root@hostname ~]# cat /etc/hosts
127.0.0.1   localhost localhost.localdomain localhost4 localhost4.localdomain4
::1         localhost localhost.localdomain localhost6 localhost6.localdomain6
/etc/hosts に lablog01 を追加すると無事起動できました。
[root@hostname ~]# cat /etc/hosts
127.0.0.1   localhost localhost.localdomain localhost4 localhost4.localdomain4 lablog01
::1         localhost localhost.localdomain localhost6 localhost6.localdomain6
以上
CentOS で特定ポートで実行されているプロセスを強制終了する
CentOS 6.3 で WebGoat を起動しようとすると以下のエラーが出力されました。
***************************
APPLICATION FAILED TO START
***************************
Description:
Web server failed to start. Port 8080 was already in use.
Action:
Identify and stop the process that's listening on port 8080 or configure this application to listen on another port.
ポート 8080 使用されているようです。
使用しているプロセスは以下のコマンドで確認できます。
[root@hostname ~]# lsof -i:8080
COMMAND   PID USER   FD   TYPE DEVICE SIZE/OFF NODE NAME
java    16915 root   26u  IPv6  53443      0t0  TCP *:webcache (LISTEN)
Java の webcache が使用しているようです。
以下のコマンドで強制終了します。
[root@hostname ~]# kill $(lsof -t -i:8080)
もしくは、
[root@hostname ~]# kill -9 $(lsof -t -i:8080)
再度ポート 8080 の使用状況を確認します。
[root@hostname ~]# lsof -i:8080
正常に終了できていれば、表示されなくなります。
参考書籍
リンク
以上
OWASP ZAP による脆弱性診断について
OWAP ZAP とは
セキュリティ診断ツール「OWASP ZAP」は、 The Open Web Application Security Project(通称 OWASP、オワスプ)という国際的なコミュニティがつくりました。
OWASP を運営しているのはアメリカの The OWASP Foundation(OWASP財団)という団体で、2001年に設立されています。いまでは世界中に 200 以上の支部を持ちます。日本にも OWASP Japan があります。OWASP 財団の目的は、Web アプリケーションを保護することで、そのために OWASP のメンバーは約 120 以上のプロジェクトを進行しています。誰でも無料で Web アプリケーションの脆弱性をチェックできる OWASP ZAP も 120 のプロジェクトの1つとして生まれました。
出典:CyberSecurityTIMES
OWASP ZAP インストール
Java のダウンロード・インストール
OWASP ZAP は Java 1.8 以上が必要なのでこちらから最新版をダウンロードしてインストールしておきます。
OWASP ZAP のダウンロード・インストール
こちらからインストーラーをダウンロードして実行します。
本例では、WIndows 64bit 版を使用しています。
インストーラーを実行すると JRE を「配置する」ボタンがでてきますので、事前にインストールした「java.exe」を指定します。

あとは、「次へ」ボタンをクリックして完了です。
OWASP ZAP 設定
セッションの保持方法を指定します。本例では、「現在のタイムスタンプでファイル名を付けてセッションを保存」を選択します。

必ず「プロテクトモード」を指定します。詳細は後述します。
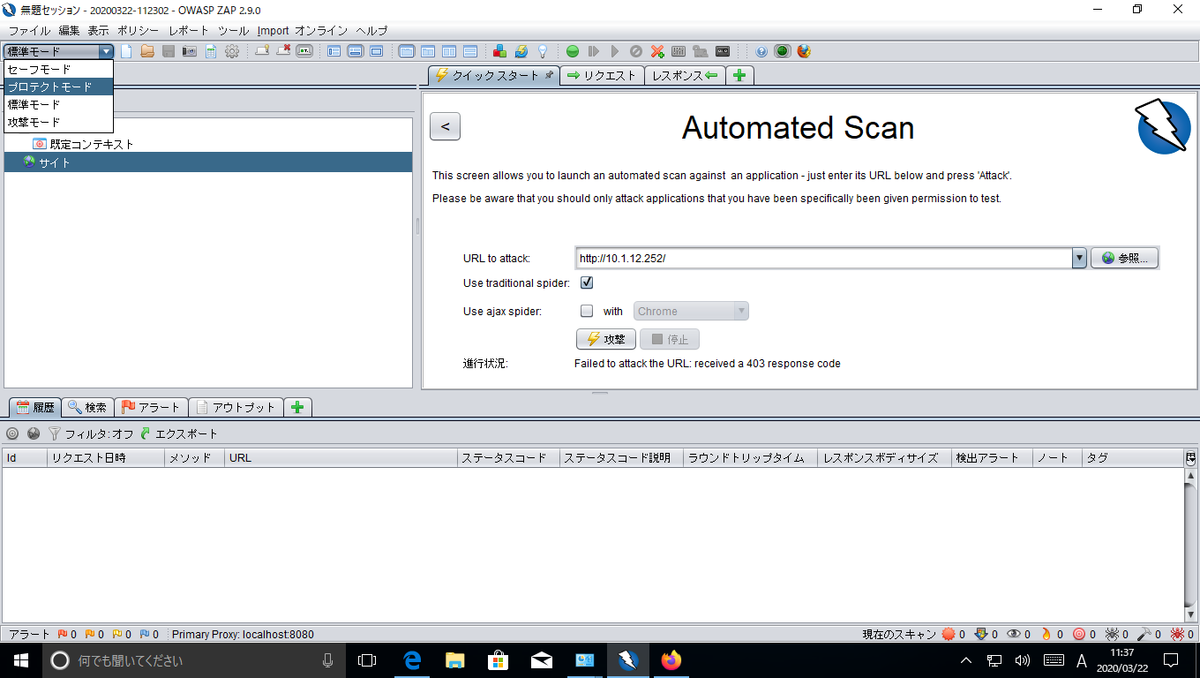
「ツール」➡「オプション」からローカルプロキシを設定します。ポートは本例では「18080」を指定します。

次に、対象サイトから各ページの URL 情報を取得するスパイダー機能を設定します。
本例では、以下のとおり設定します。
- クロールする最大の深さ(対象サイトをどこまで深く検索するか):19
- 並列スキャンスレッド数(並列処理数):2
- 新しい URI の SVN のメタデータを解析(診断対象ファイルの指定):ON
- 新しい UR Iの Git のメタデータを解析(診断対象ファイルの指定):ON
- OData 固有のパラメータを処理(診断対象ファイルの指定):ON

次に、対象サイトの診断を行う動的スキャンを設定します。
本例では、以下のとおり設定します。
- 並列スキャンするホスト数:1
- 並列スキャンスレッド数:1
- スキャン中にミリ秒単位の遅延:1000

「OK」をクリックします。
「ポリシー」➡「スキャンポリシー」を選択し、「追加」をクリックします。
任意のポリシー名を設定し、適用を「Off」「低」を選択してから「開始」をそれぞれクリックします。*1

左ペインの「インジェクション」を選択し、テストのしきい値と強度を変更します。
本例では、以下のポリシーを設定します。
- SQL インジェクション-しきい値:低
- SQL インジェクション-強度:高
- クロスサイト・スクリプティング(反射型)-しきい値:低
- クロスサイト・スクリプティング(反射型)-強度:高

しきい値はアラートをあげる判定値で、”Low” ではあいまい、"Hign" では完全に NG の場合にアラートをあげます。強度はテストの精度で、"High" はより細かなテストを行ってくれます。
ブラウザ設定
ブラウザから OWASP をプロキシとして経由して、対象サイトへアクセスすることで診断します。
本例では、Firefox を使用して OWASP を指定します。

WebGoat とは
ブラウザの設定が終わったら、診断テストが可能となります。
診断テストするために、WebGoat というわざと脆弱性を持たせた Web アプリケーションがありますので、あわせて紹介します。
WebGoat ダウンロード・インストール
本例では、CentOS 6.3(GUI)にインストールします。
Java のインストール
# Download JDK 11
cd /tmp && wget https://download.java.net/java/ga/jdk11/openjdk-11_linux-x64_bin.tar.gz

# Switch to the root user, type root password
su

# Create the folder /usr/lib/jvm
mkdir /usr/lib/jvm

# Extract the downloaded archive
tar xzvf /tmp/openjdk-11_linux-x64_bin.tar.gz --directory /usr/lib/jvm

# Create a symlink to the java binary
ln -s  /usr/lib/jvm/jdk-11/bin/java /usr/bin/java

# exit from root user
exit

# Verify that you have the right version running
java -version

# Remove the downloaded archive
rm /tmp/openjdk-11_linux-x64_bin.tar.gz
WebGoat のダウンロードと実行
# Download the latest WebGoat release jar
wget https://github.com/WebGoat/WebGoat/releases/download/v8.0.0.M26/webgoat-server-8.0.0.M26.jar

# Run WebGoat using java
java -jar webgoat-server-8.0.0.M26.jar --server.address=0.0.0.0
参考:thehackerish
診断テスト
本例では、以下の環境でテストします。
リバースプロキシの構築例は後述しますので、興味があればご参照ください。

ブラウザで対象サイトへアクセス
本例ではリバースプロキシがありますので、以下の URL へアクセスします。
http://10.1.12.252/WebGoat
アクセスした後、OWASP ZAP の左ペインに対象サイトが追加されます。

サイトを右クリックして、「コンテキストに含める」➡「既定のコンテキスト」を選択し、対象サイトを選択します。

「認証」をクリックして、認証方法、およびログインユーザーの情報を入力します。
これは、WebGoat のログイン画面の先へクロールするために必要となります。
本例では、Form-based Auhentication を使用し、以下のパラメータを指定します。
http://10.1.12.252/WebGoat
username={%username%}&password={%password%}
\Q/WebGoat/login\E
「\Q/WebGoat/login\E」は、ログアウト状態を判定するために必要なパラメータです。

次に「ユーザー」をクリックして、ログイン可能なユーザー登録します。

スパイダー実行
対象サイト内の各ページの URL 情報を収集するためにスパイダーを実行します。
対象サイトを右クリックして、「攻撃」➡「スパイダー」をクリックし、作成した「ユーザー」を選択します。
その後、「スキャンを開始」をクリックします。
※前述の「プロテクトモード」は、対象サイトのみを診断対象とします。
スパイダータブに結果が表示されます。緑は対象、赤は対象外の URL を示します。

動的スキャン
対象サイトに対して、様々なパターンの攻撃コードを仕掛けます。
対象サイトを右クリックして、「攻撃」➡「動的スキャン」をクリックし、「ポリシー」「ユーザー」で作成したユーザーを選択します。その後、「スキャンを開始」をクリックします。

結果は「アラート」タブに表示されます。
「赤」は危険度高、「オレンジ」は危険度中、「黄色」は危険度低を示します。

参考:リバースプロキシ設定
squid.conf 設定
# 59 行目追記
http_access allow all

#60 行目コメントアウト
# http_access deny all

# 64行目追記(転送元サーバーの IP アドレスを指定)
http_port 80 accel ignore-cc defaultsite=10.1.12.252

# 最終行に追記(転送先 Web サーバーの IP アドレスを指定)
cache_peer 10.1.23.253 parent 8080 0 no-query originserver

# 最終行に追記(メモリキャッシュサイズ)
cache_mem 256 MB

# 最終行に追記(ホスト名定義)
visible_hostname prox.srv.world
squid 再起動
/etc/rc.d/init.d/squid restart
以上
*1:全ての診断を無効化します。
ONTAP 9.4 で各カウンタを取得するコマンド
コントローラ単位
例)コントローラ単位で、CPU、メモリ、IOPS 関連のカウンタを1秒間隔で取得して表示
> set diagnostic
*> statistics show-periodic -object system:node -instance cl-01 -interval 1  -counter cpu_busy|memory|read_ops|write_ops|total_ops|system_ops|read_latency|write_latency|total_latency|instance_name
cl: system:node.cl-01: 7/5/2019 23:07:47
  cpu instance              read            system    total    total    write    write    Complete    Number of
 busy     name   memory  latency read_ops      ops  latency      ops  latency      ops Aggregation Constituents
 ---- -------- -------- -------- -------- -------- -------- -------- -------- -------- ----------- ------------
   3%    cl-01     2160      0us        0        2      0us        0      0us        0      Yes      1
   1%    cl-01     2160      0us        0        8      0us        0      0us        0      Yes      1
   2%    cl-01     2160      0us        0        2      0us        0      0us        0      Yes      1
   1%    cl-01     2160      0us        0        2      0us        0      0us        0      Yes      1
   1%    cl-01     2160      0us        0        0      0us        0      0us        0      Yes      1
   2%    cl-01     2160      0us        0        2      0us        0      0us        0      Yes      1
   1%    cl-01     2160      0us        0        5      0us        0      0us        0      Yes      1
ボリューム単位
例)ボリューム単位で、CPU、メモリ、IOPS 関連のカウンタを1秒間隔で取得して表示
> set diagnostic
*> statistics show-periodic -object volume -instance vol1 -interval 1 -counter avg_latency|instance_name|read_latency|read_ops|total_ops|write_latency|write_ops
cl: volume.vol1: 7/5/2019 23:12:21
      avg instance     read             total    write    write    Complete    Number of
  latency     name  latency read_ops      ops  latency      ops Aggregation Constituents
 -------- -------- -------- -------- -------- -------- -------- ----------- ------------
      0us     vol1      0us        0        0      0us        0      n/a      n/a
      0us     vol1      0us        0        0      0us        0      n/a      n/a
      0us     vol1      0us        0        0      0us        0      n/a      n/a
      0us     vol1      0us        0        0      0us        0      n/a      n/a
      0us     vol1      0us        0        0      0us        0      n/a      n/a
      0us     vol1      0us        0        0      0us        0      n/a      n/a
      0us     vol1      0us        0        0      0us        0      n/a      n/a
以上
Data ONTAP 7-Mode を Cluster-Mode へ変換する方法について
NetApp の DataOntap のモードを、7-Mode から Cluster-Mode に変換する手順です。
※この手順を使用すると、ディスク上のデータおよび、設定は保持されず、すべてのデータが失われます。
1. クラスタ構成の場合、「クラスタフェイルオーバー」を無効にして、ノードを再起動し、LOADER プロンプトに移行します。
クラスタ構成じゃない場合は、「halt」を実行します。
> cf disable
> cf status
> halt -f
2. 環境変数変更
LOADER> set-defaults
LOADER> setenv AUTOBOOT false
LOADER> setenv bootarg.init.bootmenu true
3. 環境変数確認
LOADER> printenv AUTOBOOT
LOADER> printenv bootarg.init.bootmenu
4. Config 消去
LOADER> boot_ontap
※CTRL + C を押下し、Boot Menu で「wipeconfig」を入力して実行
5. 環境変数変更(7-Mode を Cluster-Mode へ変換)
LOADER> set-defaults
LOADER> setenv bootarg.init.boot_clustered true
6. 環境変数確認
LOADER> printenv bootarg.init.boot_clustered
7. ノード構成をリセット
LOADER> boot_ontap
※CTRL + C を押下し、Boot Menu で「4」を実行
8. Zeroing 完了後、Cluster Setup が起動
以上
Zabbix 4.2 簡易構築手順
基本設定
日本語キーボード配列設定
sudo dpkg-reconfigure keyboard-configuration
Generic 105-key (Intl) PC ➡ Japanese ➡ Japanese ➡ The Default for the keyboard layout ➡ No compose key と選択します。
vi 互換モード OFF*1
touch ~/.vimrc
vi ~/.vimrc
set nocompatible
Backspace の有効化
vi ~/.vimrc
set backspace=indent,eol,start
ネットワーク設定
インターフェース確認
ifconfig -a
ネットワーク設定
sudo vi /etc/network/interfaces
# This file describes the network interfaces available on your system
# and how to activate them. For more information, see interfaces(5).

source /etc/network/interfaces.d/*

# The loopback network interface
auto lo
iface lo inet loopback

# The primary network interface
auto ens32
iface ens32 inet static
address 192.168.1.31
netmask 255.255.255.0
network 192.168.1.0
broadcast 192.168.1.255
※vi で read only のファイルを sudo で強制的に保存
:w !sudo tee %
:q!
デフォルトルート設定
sudo route add default gw 192.168.1.2
DNS 設定
vi /etc/resolved.conf
nameserver 8.8.8.8
Zabbix ホスト登録
以下の URL にアクセスします。
http://ZabbixIP/zabbix/
Admin:zabbix
右上の人型アイコンから日本語設定をします。

設定 ➡ ホストの作成をクリック

ホスト名、グループ、IP アドレス/DNS 名 を指定し「追加」をクリック

登録されたホスト名をクリック

テンプレートをクリック

任意のテンプレートを選択して「追加」をクリック

「更新」をクリックして完了

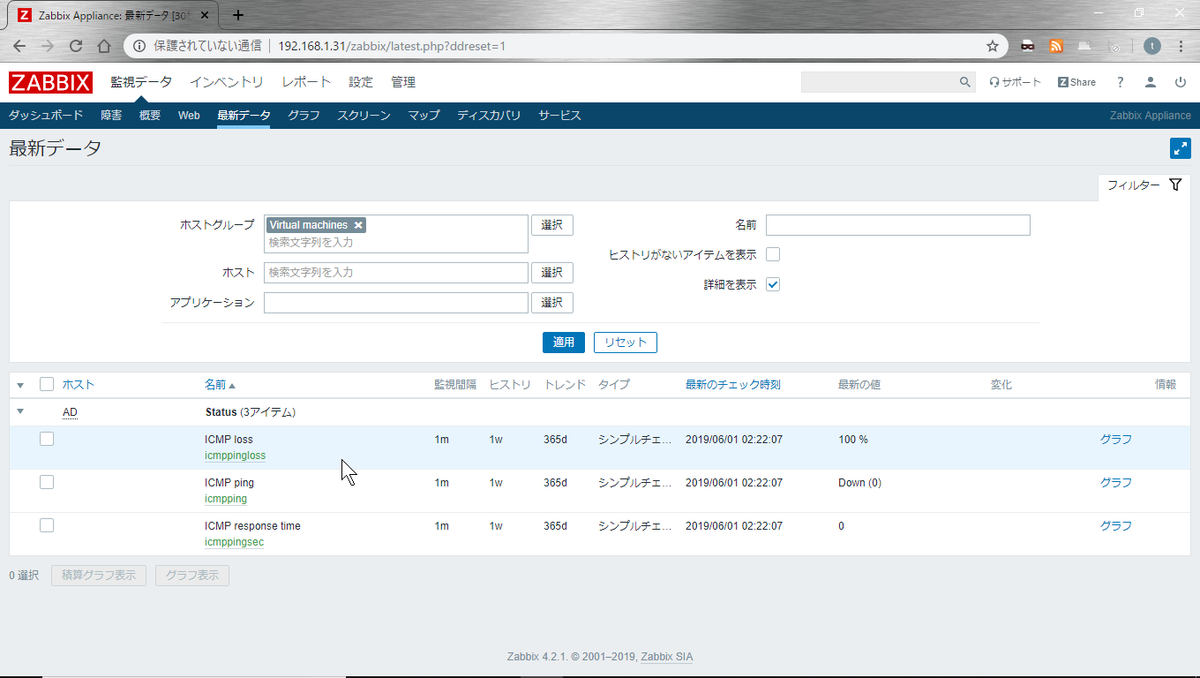
監視データ確認
監視データ ➡ 最新データ 等で状態を確認できます。
以上
*1:vi で方向キーが ABCD を入力してしまう問題の解決
仮想ディスクダイジェストの再計算について
vCenter 上で「仮想ディスクダイジェストの再計算」というタスクが頻繁に発生し、この処理が発生している間、「ホストごとの読み取りIOPS」が高くなるという事象に遭遇しました。
「仮想ディスクダイジェストの再計算」は、View Storage Accelerator の関連処理となります。
View Storage Accelerator とは
View Storage Accelerator の注意事項
- View Storage Accelerator は IO 低減のための機能ですが、「仮想ディスクダイジェストの再計算」が行われるタイミングは負荷を悪化させる可能性があります。
- 負荷がかかる時間帯*3を避けるため、ESXi ホストでこれらの操作を実行しない日時を指定可能です。
参考:View Composer リンク クローン用の Storage Accelerator と領域再利用の停電期間の設定
その他
通常、指定した間隔および、仮想マシンの再構成時に発生する「仮想ディスクダイジェストの再計算」ですが、仮想マシンの再起動時に発生するといった事象がありました。原因不明ですが、View Storage Accelerator を無効→有効化することで解消しました。
以上